Friday, May 20, 2011

Apple Spice Cupcakes


I have a good friend named Kristen, who is a gorgeous and impressive mother of six children, ages seven and under: including a set of twins and a set of triplets. She's simply amazing.

It was her birthday this week, and I wanted to make her something special. She works around the clock to keep her teething triplets and older children happy, and I think that makes her worthy of special treatment every day, but especially on her birthday. I also wanted to try something new, and I thought I might be gambling with this one, but it turn out surprisingly well! 

I recently spotted a recipe for stuffed black forest cupcakes... however, I'm not a fan of non-fresh cherries (it's one of the few foods I refuse to eat) and decided to make the recipe with a twist. A box of spice cake. A can of apple pie filling. Stuffed with cream cheese. Apple butter frosting. Drizzled with caramel. YUM!

Ingredients:

1 box of spice cake 
1 can of apple pie filling (diced)
2 (8 oz each) packages of cream cheese (softened)
1 egg
2 tbs sugar
4 tbs apple butter (start with this amount and add more if you like a more bold flavor - I personally double it)
1 stick butter or margarine (softened)
1 cup confectioners sugar
1/2 lb caramels, melted in some milk and confectioners sugar


Frosting: Make the frosting first! This will give it a chance to set up and make it easier to work with. Blend 1 package of cream cheese, confectioners sugar, butter/margarine, and the apple butter. Let set up in the fridge.

Directions: Prepare the cake mix as directed on the box, and line two muffin tins with cupcake liners (should make at least 24). Blend the remaining package of cream cheese, egg, and sugar. Spoon 1.5 tablespoons of batter into each liner, topped with 2 tsps of the cream cheese spread and a small spoonful of the pie filling. Fill the remainder (almost to the top of the liner) with more cake batter. Repeat for all remaining cupcakes. Bake for 20-25 minutes.

 (before the top layer was put on)


Let the cupcakes cool before frosting them. If you have any left over pie filling, you can pipe the frosting in a circle and garnish with the pie filling, or simply frost them how you please. Melt the caramels with a little bit of milk and some confectioners sugar and drizzle over the top of the cupcakes. The more milk you add, the runnier it will be, so start off small and work your way up.


Let sit in the fridge overnight (though, you should wait to drizzle with caramel until you're ready to eat them)- this will allow the cupcakes to set completely, and will make them very moist!

Saturday, May 14, 2011

Southwestern Scrambled Omelet


I know, I know. Omelets aren't scrambled. Well, mine is. I'm usually too impatient and too busy to have the time to spend on making such masterpieces, but I don't mind :) I think what this recipe is just as good as any ol' omelet. What I like about this recipe is that as a poor and busy college student, I can make the mix on Sunday night and have it last through Friday or Saturday morning. If you use it for your family, it only takes as long as it takes to cook the chicken breast and to scramble the mix. Because it is scrambled, you can do smaller portions and use it as a side to pancakes or waffles, or use a whole meal.

Ingredients:

12 eggs
1/2 cup of milk
1 cooked and cubed chicken breast
Your choice of vegetables
1 cup shredded cheese (optional)
Salsa (optional)


Directions: Thaw and cube the chicken breast, and cook thoroughly. While chicken breast is cooking, crack the eggs in a medium sized bowl, and use a whisk to gently break up the eggs. Add the milk, shredded cheese, and your choice of diced vegetables. (For these pictures I just used olives, which is all I had on hand, but I sometimes use tomatoes, broccoli, and red and green bell peppers. The more vegetables you use, the heartier of a scramble you'll have.)


Scramble the mix as you would regular eggs. Portion out the scrambled omelet eggs on plates and garnish with salsa, or use salt and pepper in lieu of salsa. This also tastes great on toast or rolled up in a warm tortilla.

This recipe costs only as much as you put into it :)

Friday, May 13, 2011

Oatmeal Chocolate Chip Cookie Dough Bonbons


These are likely the least glamorous of my "creations," nevertheless, they are quite tasty :) The title pretty much says it all - chocolate chip cookie dough (with oatmeal) covered in chocolate. It's a common mistake to think a bonbon refers to chocolate coated ice cream, but these will knock the socks off of you, even if my pictures aren't super pretty.

This recipe can be made just as easily and yumm-ily with regular chocolate chip cookie dough - I just have a personal preference for oatmeal in the mix.

Being a poor college student who was fresh out of floor and oatmeal, I did what any poor person would do and bought a Betty Crocker mix instead of replenishing my store. Sure, in the long run it would probably have been cheaper to just buy the floor and oatmeal, but I didn't. However, you can use whatever recipe, mix, or prepared cookie dough your heart desires!

To omit the raw egg aspect, I substituted the one egg that the mix called for with 3/8 cup of milk. If that math is a little too wacky for you, it's one 1/4 of a cup and a half of another 1/4 of a cup.

Ingredients:

Chocolate chip oatmeal cookie dough
Milk
Chocolate Almond Bark*
Vanilla Almond Bark*


Directions: 

Prepare cookie dough as directed on the package or in your recipe book. Omit the egg by replacing it with enough milk to keep it as moist as necessary to stay glued together, but not so much that the dough is runny.


Roll the cookie dough into small balls using a melon baller or a tablespoon. Freeze cookie dough balls in the freezer for about half an hour (they can be stacked on each other).
 

Melt two squares of chocolate almond bark in the microwave, in 30 second intervals. Dip frozen cookie dough balls in the almond bark and lay out on a piece of wax paper (they will stick to any other surface and break when you try to remove them). Drizzle with melted vanilla almond bark.

Pop them back into the freezer for a few minutes to harden them up again and they'll be ready to enjoy!

To buy all the ingredients necessary, this can cost anywhere from $3-$10. I had everything on hand, minus the cookie dough, so I got away with it for only $1.60.


* I prefer to use almond bark for dipping things, because it is thinner and spreads further than chocolate chips. One package of almond bark is more expensive than chocolate chips (by about $1), but it spreads further, drizzles more easily, and is softer to bite into :) You are, most definitely, welcome to use chocolate chips instead.


Sunday, May 8, 2011

Strawberry Cream White Chocolate Cake

This decadent cake, which I shall call 'Strawberry Dream Cake' for short, is delicious. If you think that's a corny name for a cake, the taste will persuade you otherwise. I created this recipe after receiving a recipe from my cousin's mother-in-law, tweaking it a little, and creating my own frosting.


I was in charge of the dessert for our Newren family Easter lunch. I knew immediately I wanted to make this cake. Not bragging, of course, but my whole family was completely enamored. Everyone who commented on it told me it was the best cake they ever had, and even my grandpa (who normally refrains from eating desserts, gluten, or anything sugary) LOVED it. I think that was the best part :)

I didn't take pictures of the original, but I made it again for Mother's Day (whether or not it was to take the pictures, I'll let you decide...)


Strawberry Dream Cake*:

1 package Betty Crocker Strawberry Cake Mix (with pudding in the mix)
1/2 small package of Jello brand strawberry pudding
2 cups water
2 eggs
4 oz (1/2 package) cream cheese - at room temperature
8 oz (almost a whole bag) of white chocolate chips, or white bakers chocolate
1 cup heavy whipping cream
8 oz (small container) whipped topping
Strawberries (optional)
Dark chocolate bar for shavings (optional)

(Tip of the day - prepare the frosting before making the cake)
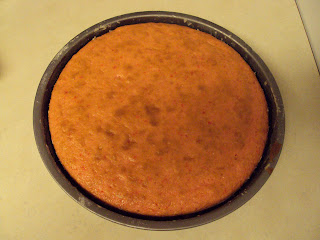
Directions: In large mixing bowl, combine the dry cake mix and dry pudding mix, 2 cups of water, and 2 eggs. Beat enough to leave only small lumps in the batter. Pour batter into prepared 13x9 cake pan or two round 8x8 or 9x9 cake pans. Bake at 350 for about 30 minutes. (In my pictures I am making a double recipe*)


Due to the nature of this cake, a toothpick might not come out completely clean, but you'll known it's done when the top is nearly completely golden. Let the cake(s) completely cool before frosting.


Frosting: In a small-medium sauce pan, heat the heavy whipping cream until it just barely starts to boil. In a medium sized bowl combine the white chocolate and room temperature cream cheese. Pour the heavy whipping cream over it and mix thoroughly. Fold in frozen whipped topping. If the frosting is too runny to work with, put it in the freezer for a couple of hours to let it harden up. (I have no pictures of this process, because I made a double frosting recipe the last time I made this cake and had leftovers that I froze.)


Prepare as you like, or: apply a moderately thin layer of frosting and strawberries between the layers of cake, and stack (if making a round cake). Use remaining frosting to coat the entirety of the cake.
(Another tip - strawberry slices between the layers can help to even out lopsided cakes.)


 Dress with sliced strawberries (coated in lime or lemon juice to preserve them) and chocolate shavings (a cheese grater works wonders!) or break a nutty candy bar into chunks and throw on top. Keep it in the fridge until the frosting sets up - once it is set, it should remain that way.


This recipe costs anywhere from $7-$10 depending on the deals you find at the store :) I was able to make it for only $7.

* This make a very dense cake that will barely rise, if at all, so I personally double the recipe for a three-layered round cake with enough batter left over for a handful of cupcakes. Only the cake/pudding/water/eggs part of the recipe needs to be doubled - and bake the cakes an extra 5 minutes. The frosting makes more than enough for one flat cake, and is perfect for a taller round cake.